Congrats on taking the first step to automatically sync your WooCommerce store with Xero using MyWorks Sync! This doc will take you through the easy steps of setting up MyWorks Sync for the first time and help you get started.
Check out our handy setup video we've also made to help guide you through these setup steps!
1. Connect to Xero
In your MyWorks Account, visit your Xero Sync plan where you can connect to your Xero company by following the steps below:
- Enter your WooCommerce Store URL (ex. https://mystore.com)
- Click “Connect to Xero” to sign in and connect to your Xero company
- Copy the Connection Key on this page, for Step 2 below
2. Add MyWorks to your site
Next, easily add the MyWorks helper plugin to your WooCommerce store. If you haven't installed it yet, it's easy to find in Plugins > Add New in your store admin - by searching for "MyWorks" (You can also download the .zip file from within your account with us.)
Once activated, visit MyWorks Sync > Connection on your store to add your Connection Key from step 1.
3. Set Default Settings
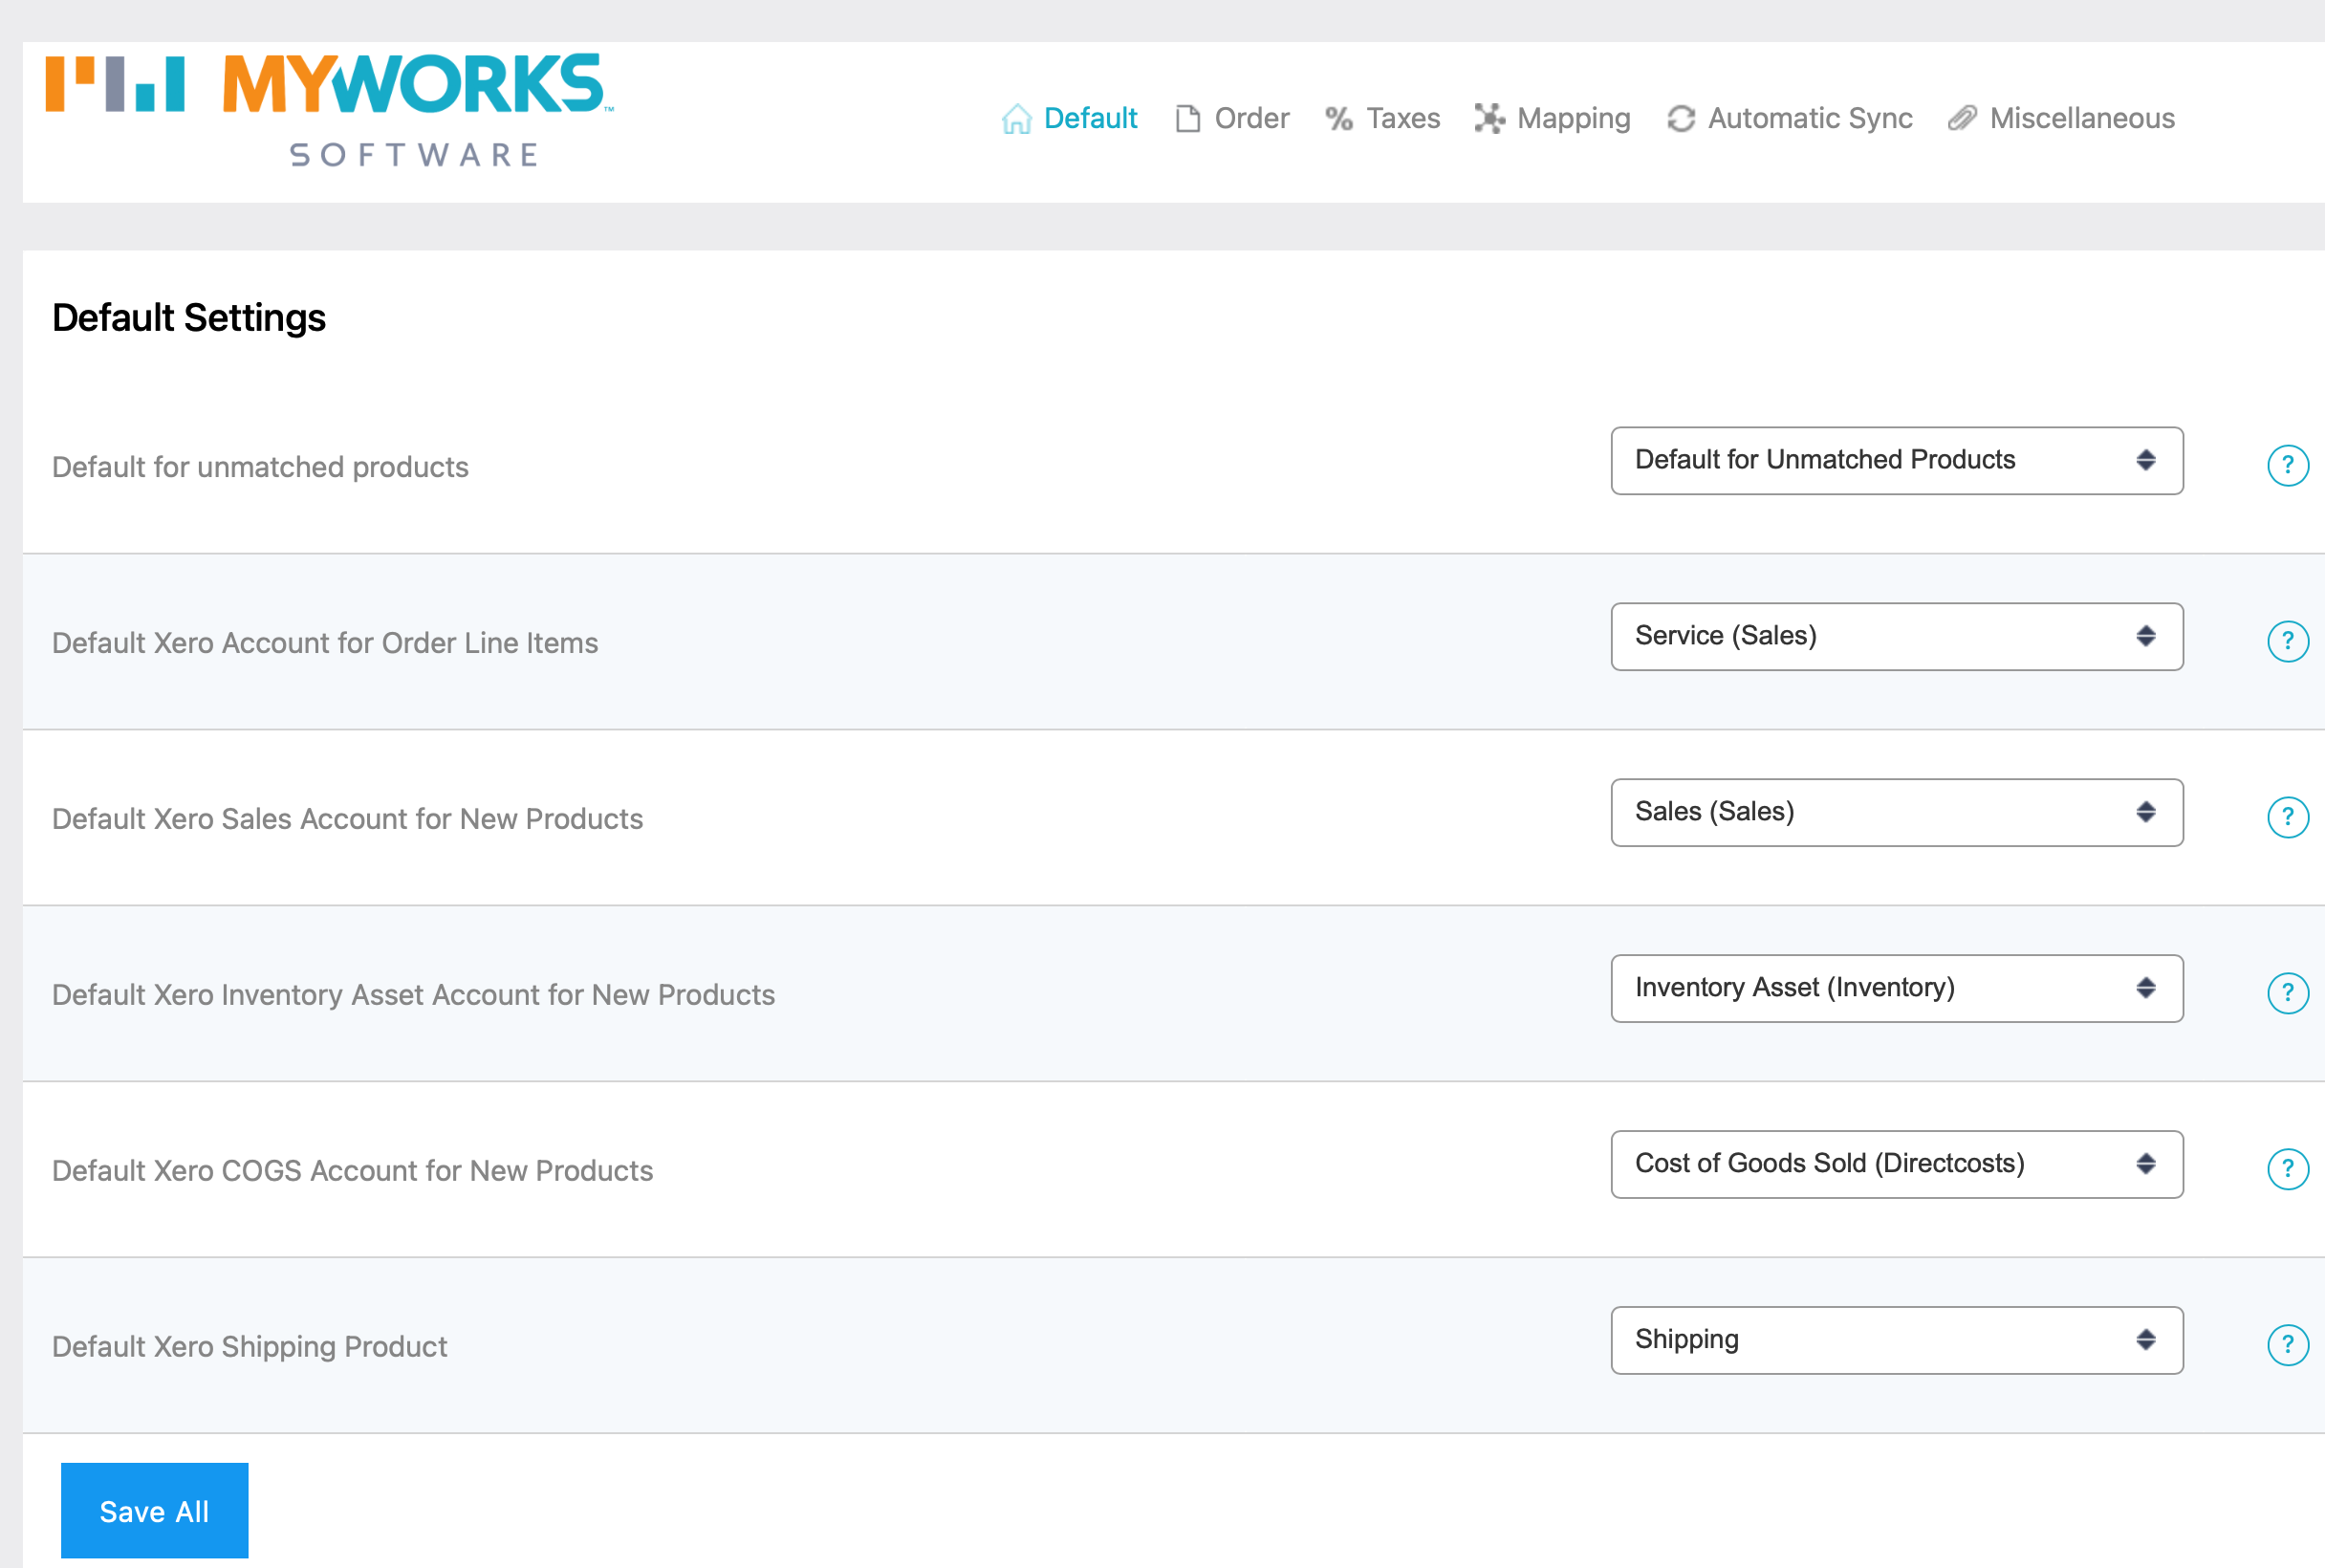
Now that MyWorks is active, it's time to review your settings! Some settings will be automatically set for you!

4. Map existing data
Now that your settings are confirmed, the last step is to review your mappings, which can be found in MyWorks Sync > Map in your WooCommerce admin.
Customers
Normally, you don't need to map your customers together, even if they exist in both WooCommerce and Xero. MyWorks automatically will check Xero for an existing customer each time an order is synced. The only time to map a customer is if you would like that to act as an override - linking a WooCommerce customer to a Xero customer with a different name or email.
Products & Variations
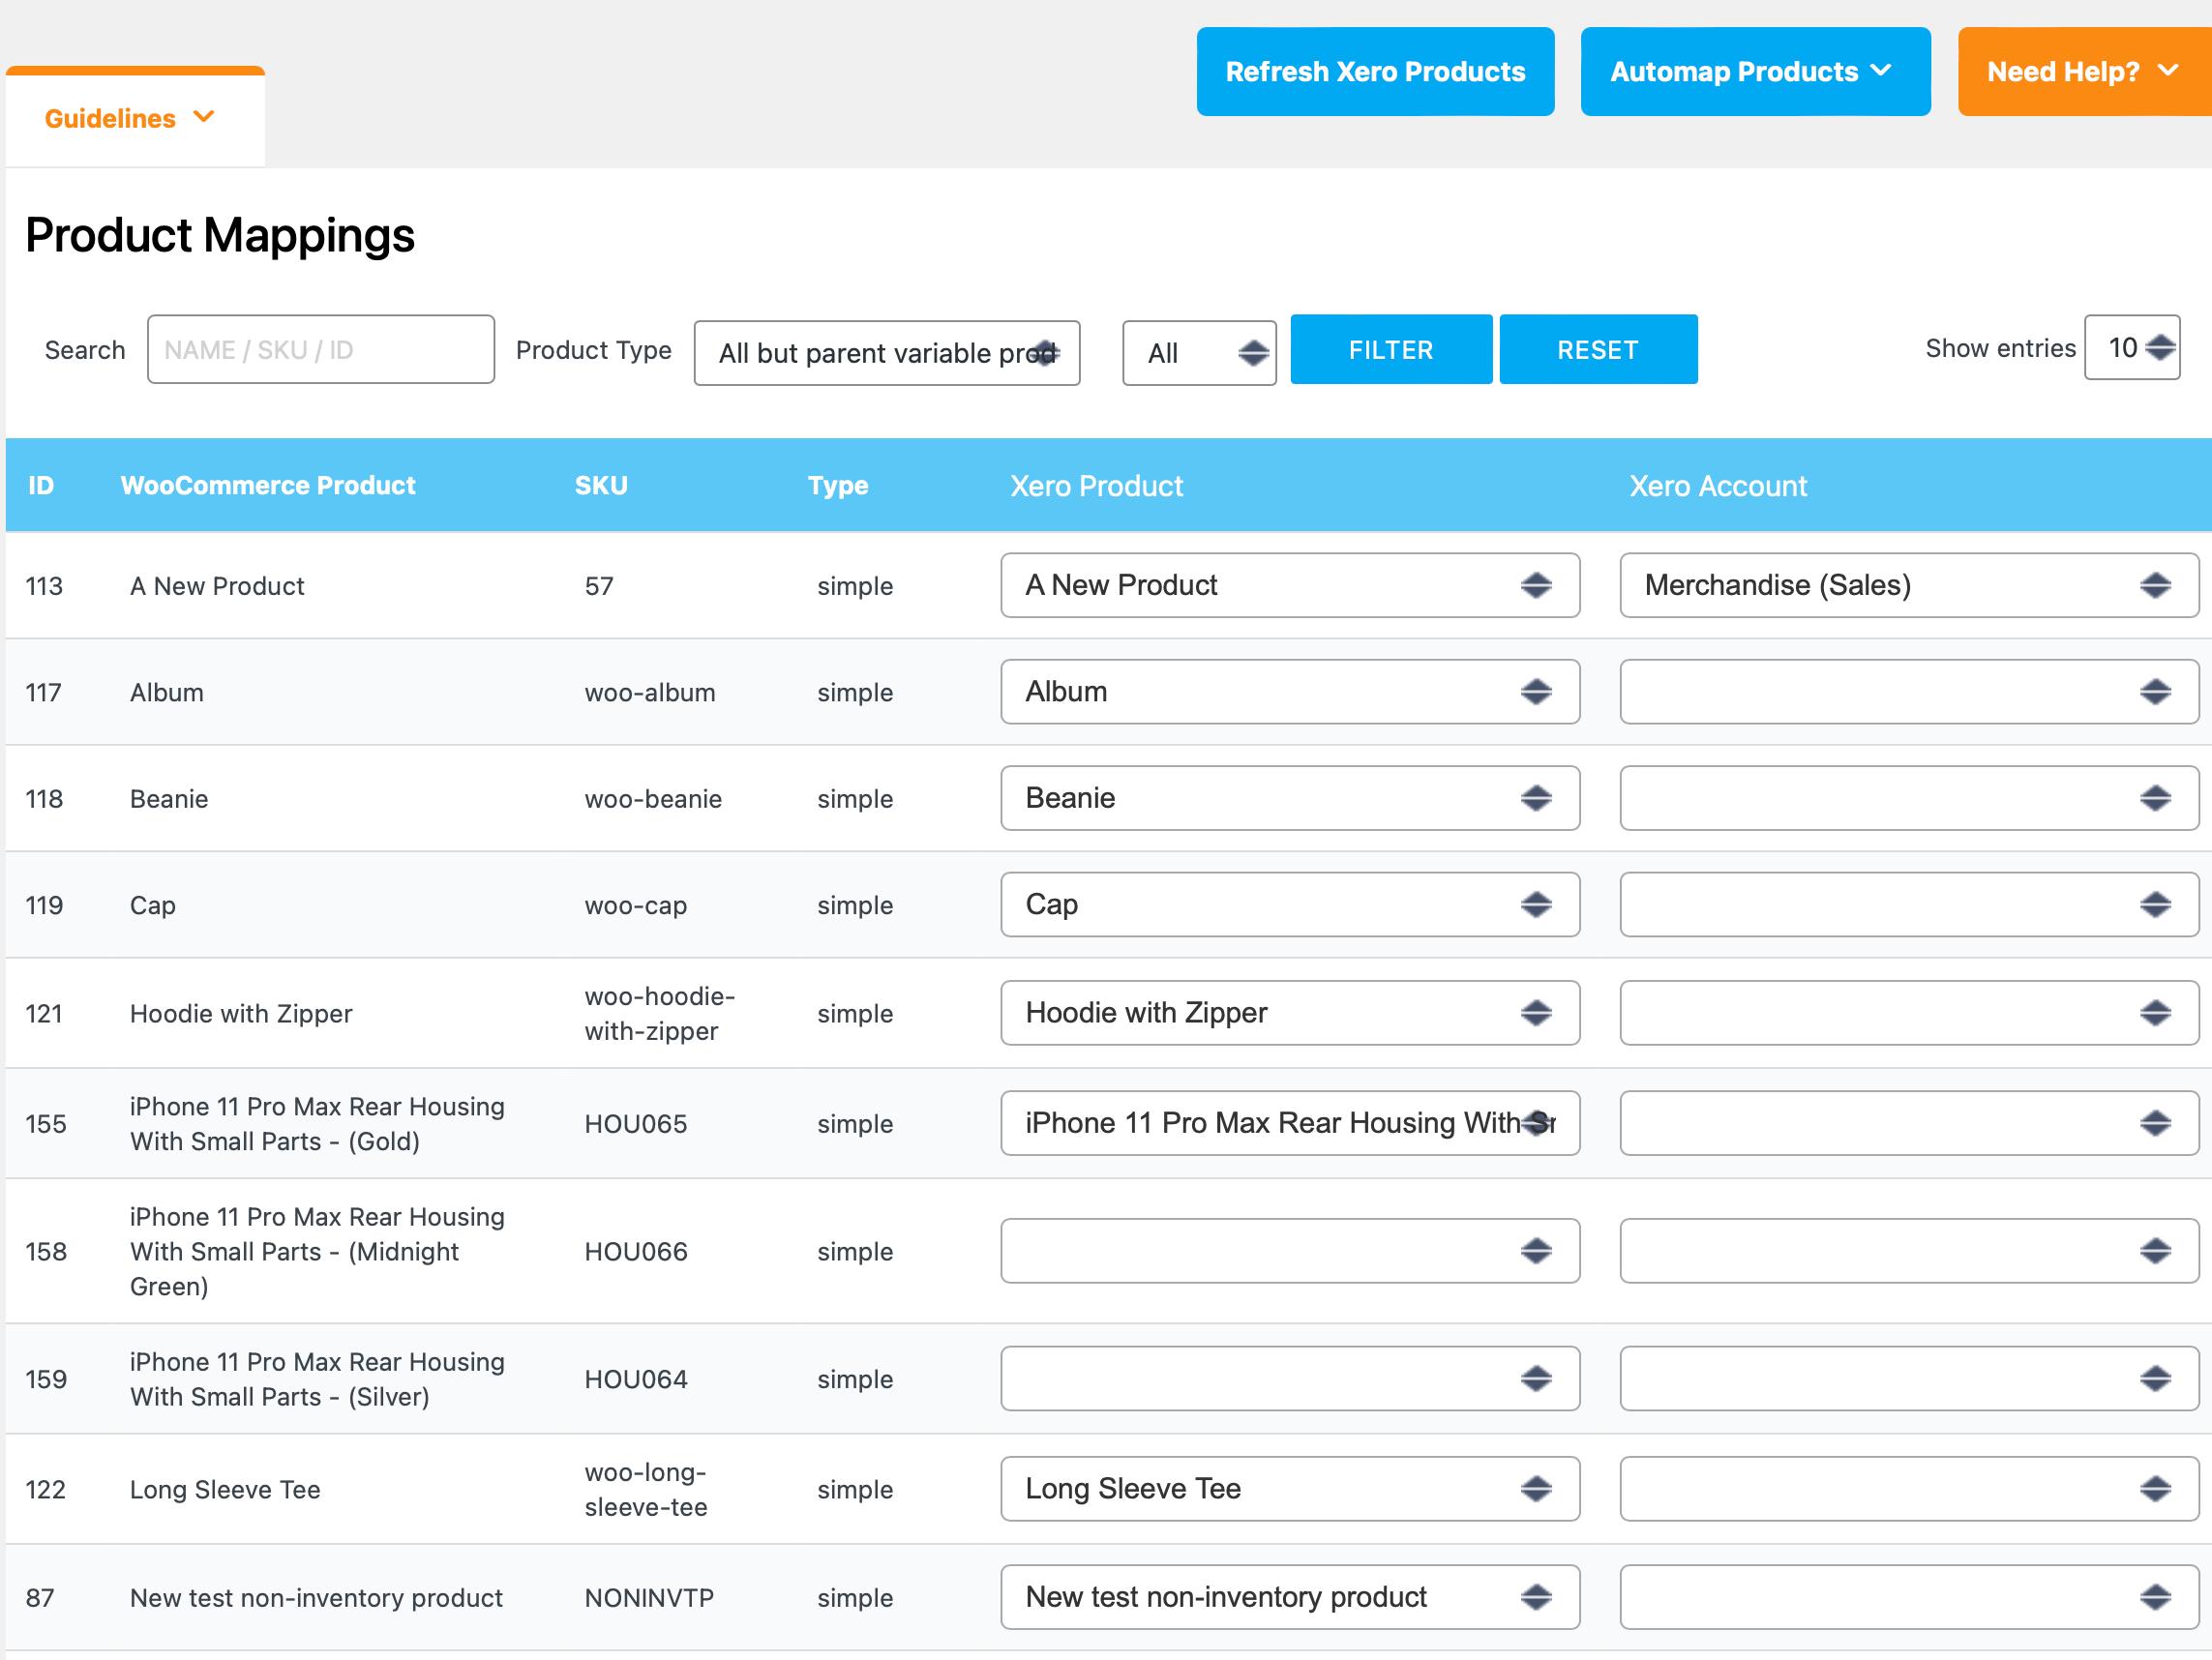
You can map your WooCommerce products, variations, or categories to corresponding Xero Products and/or Accounts. This ensures that when MyWorks is syncing orders from WooCommerce > Xero, that the desired Xero products and accounts are used in the line items of each order in Xero. This also then enables MyWorks to sync inventory / prices from Xero > WooCommerce for any product that's mapped - if enabled in our settings.
Products and variations can be mapped in two ways:
- Automatically, by using the Automap tool (if names/SKUs match) - or,
- Manually, by selecting a Xero product in the dropdown for the desired product.
Once a product/variation is mapped, it will remain mapped until/unless deleted in WooCommerce or Xero - or unmapped on this page.

Payment Methods
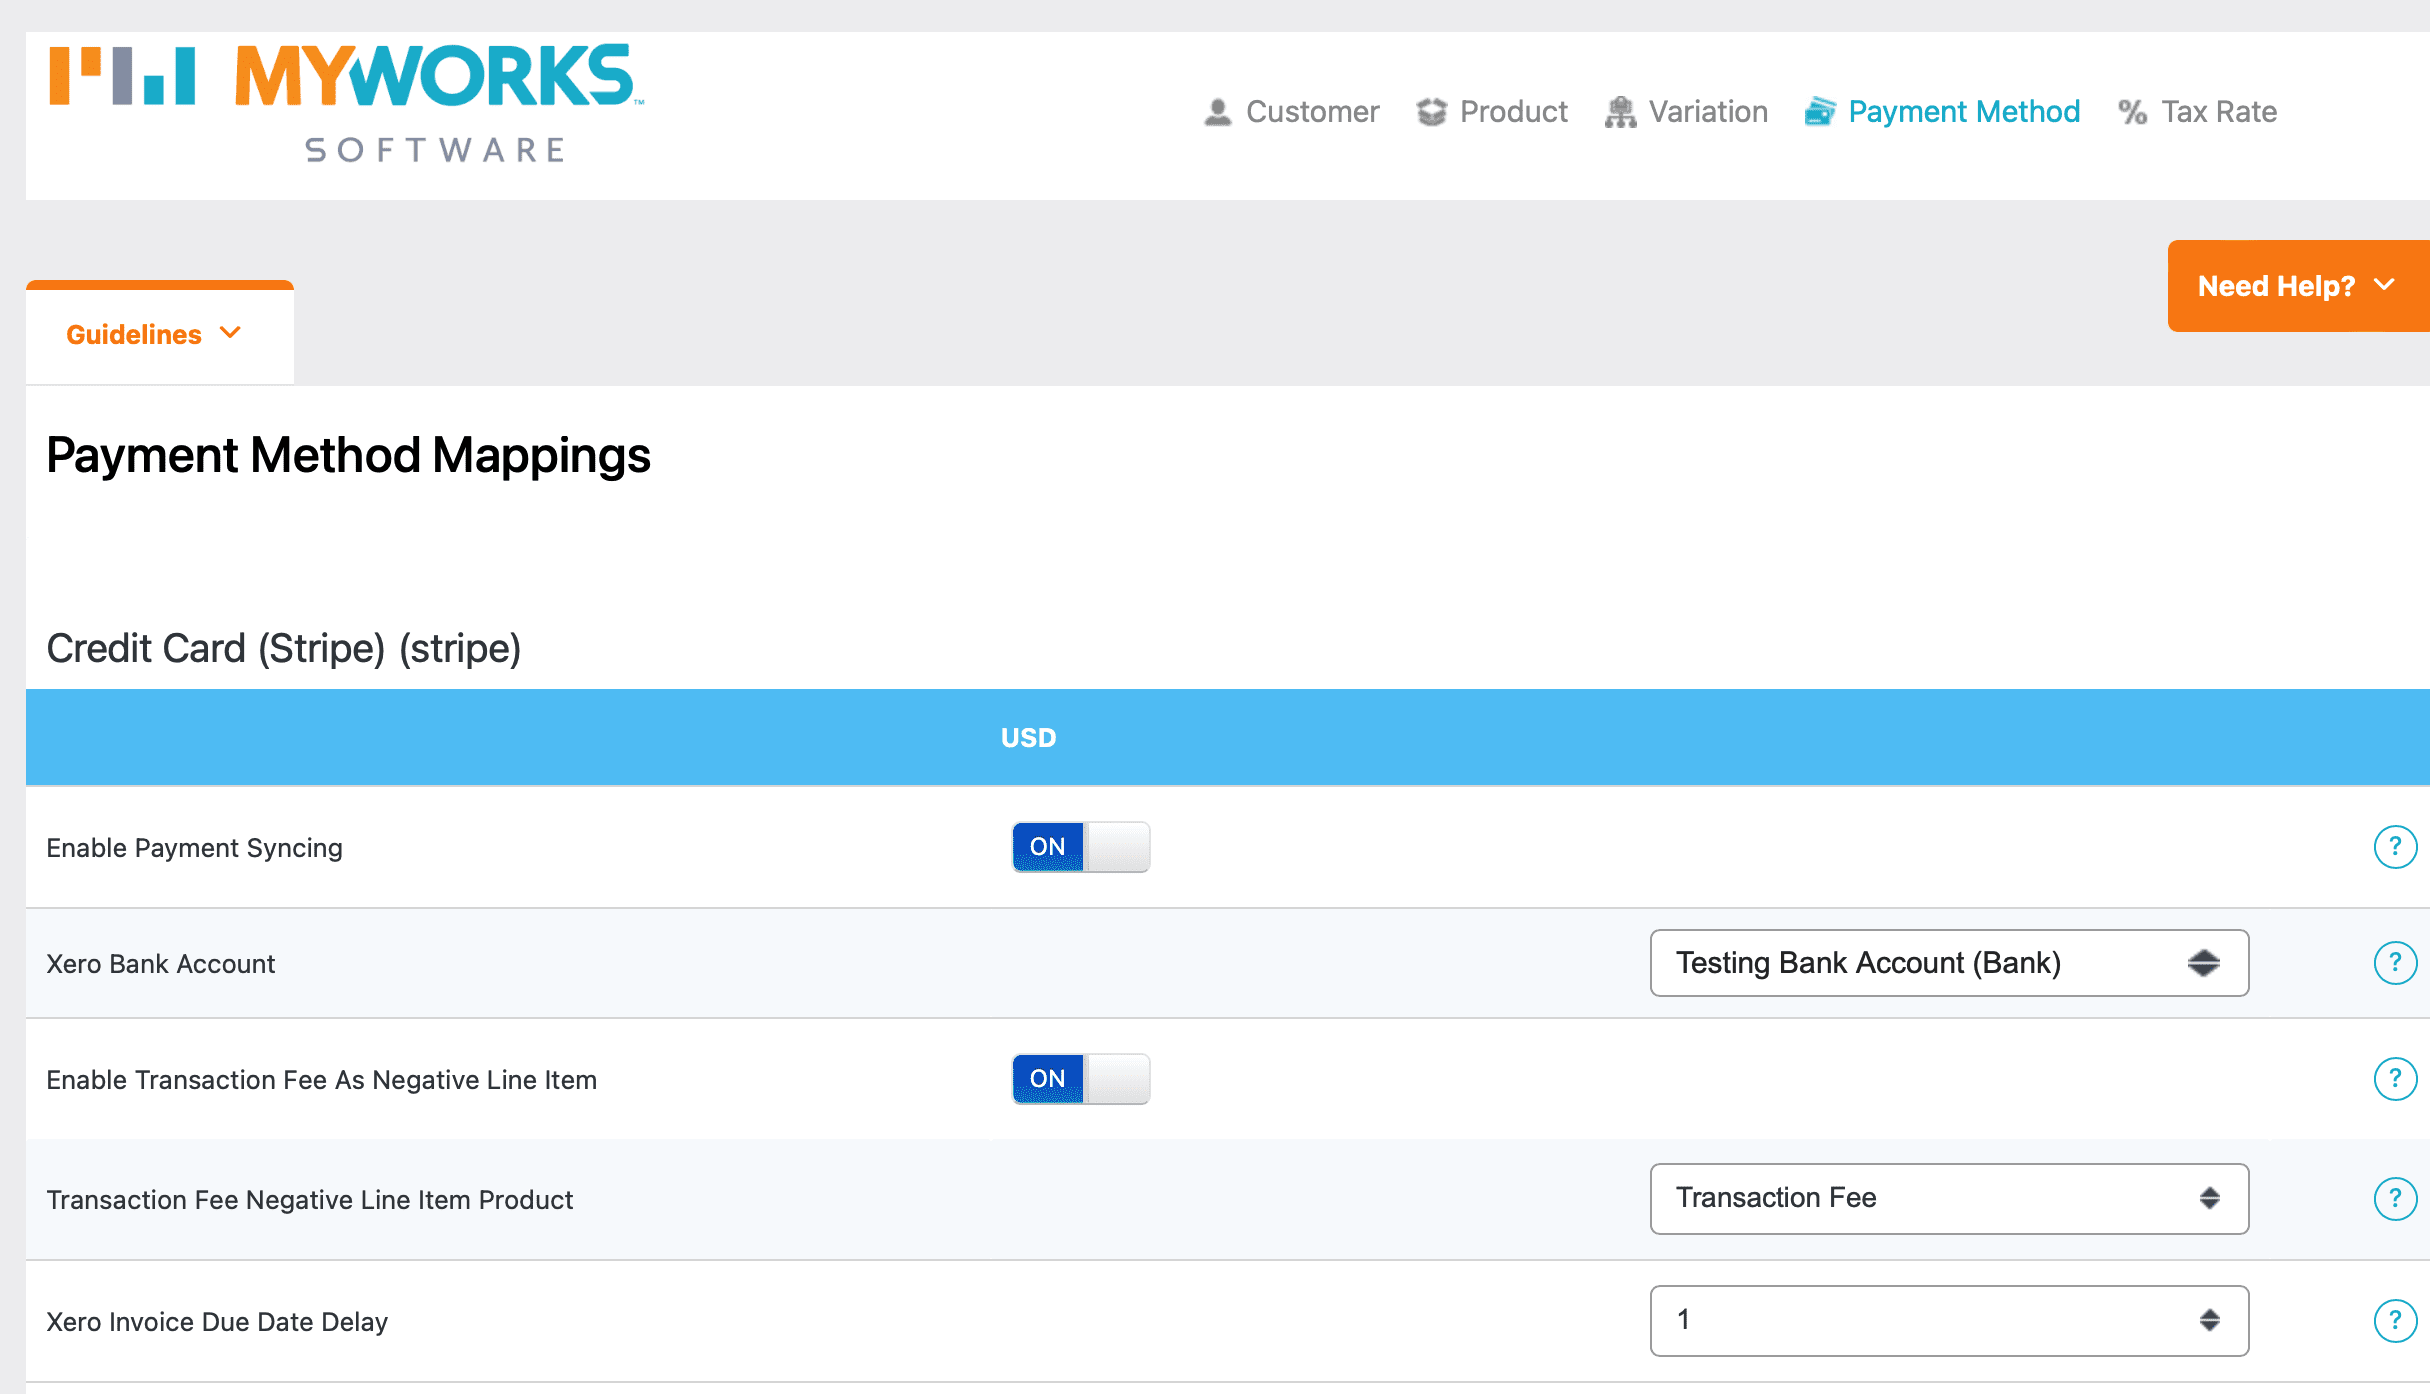
Mapping your WooCommerce payment methods ensures that as orders sync from WooCommerce to Xero, the payments are sent to the desired bank account in Xero. Additionally, you can enable the option to sync transaction fees as a negative line item; and set a specific due date for the Xero Invoice here as well.
On this page, there will be a section for each payment method that's currently active on your WooCommerce store.

Tax Rates
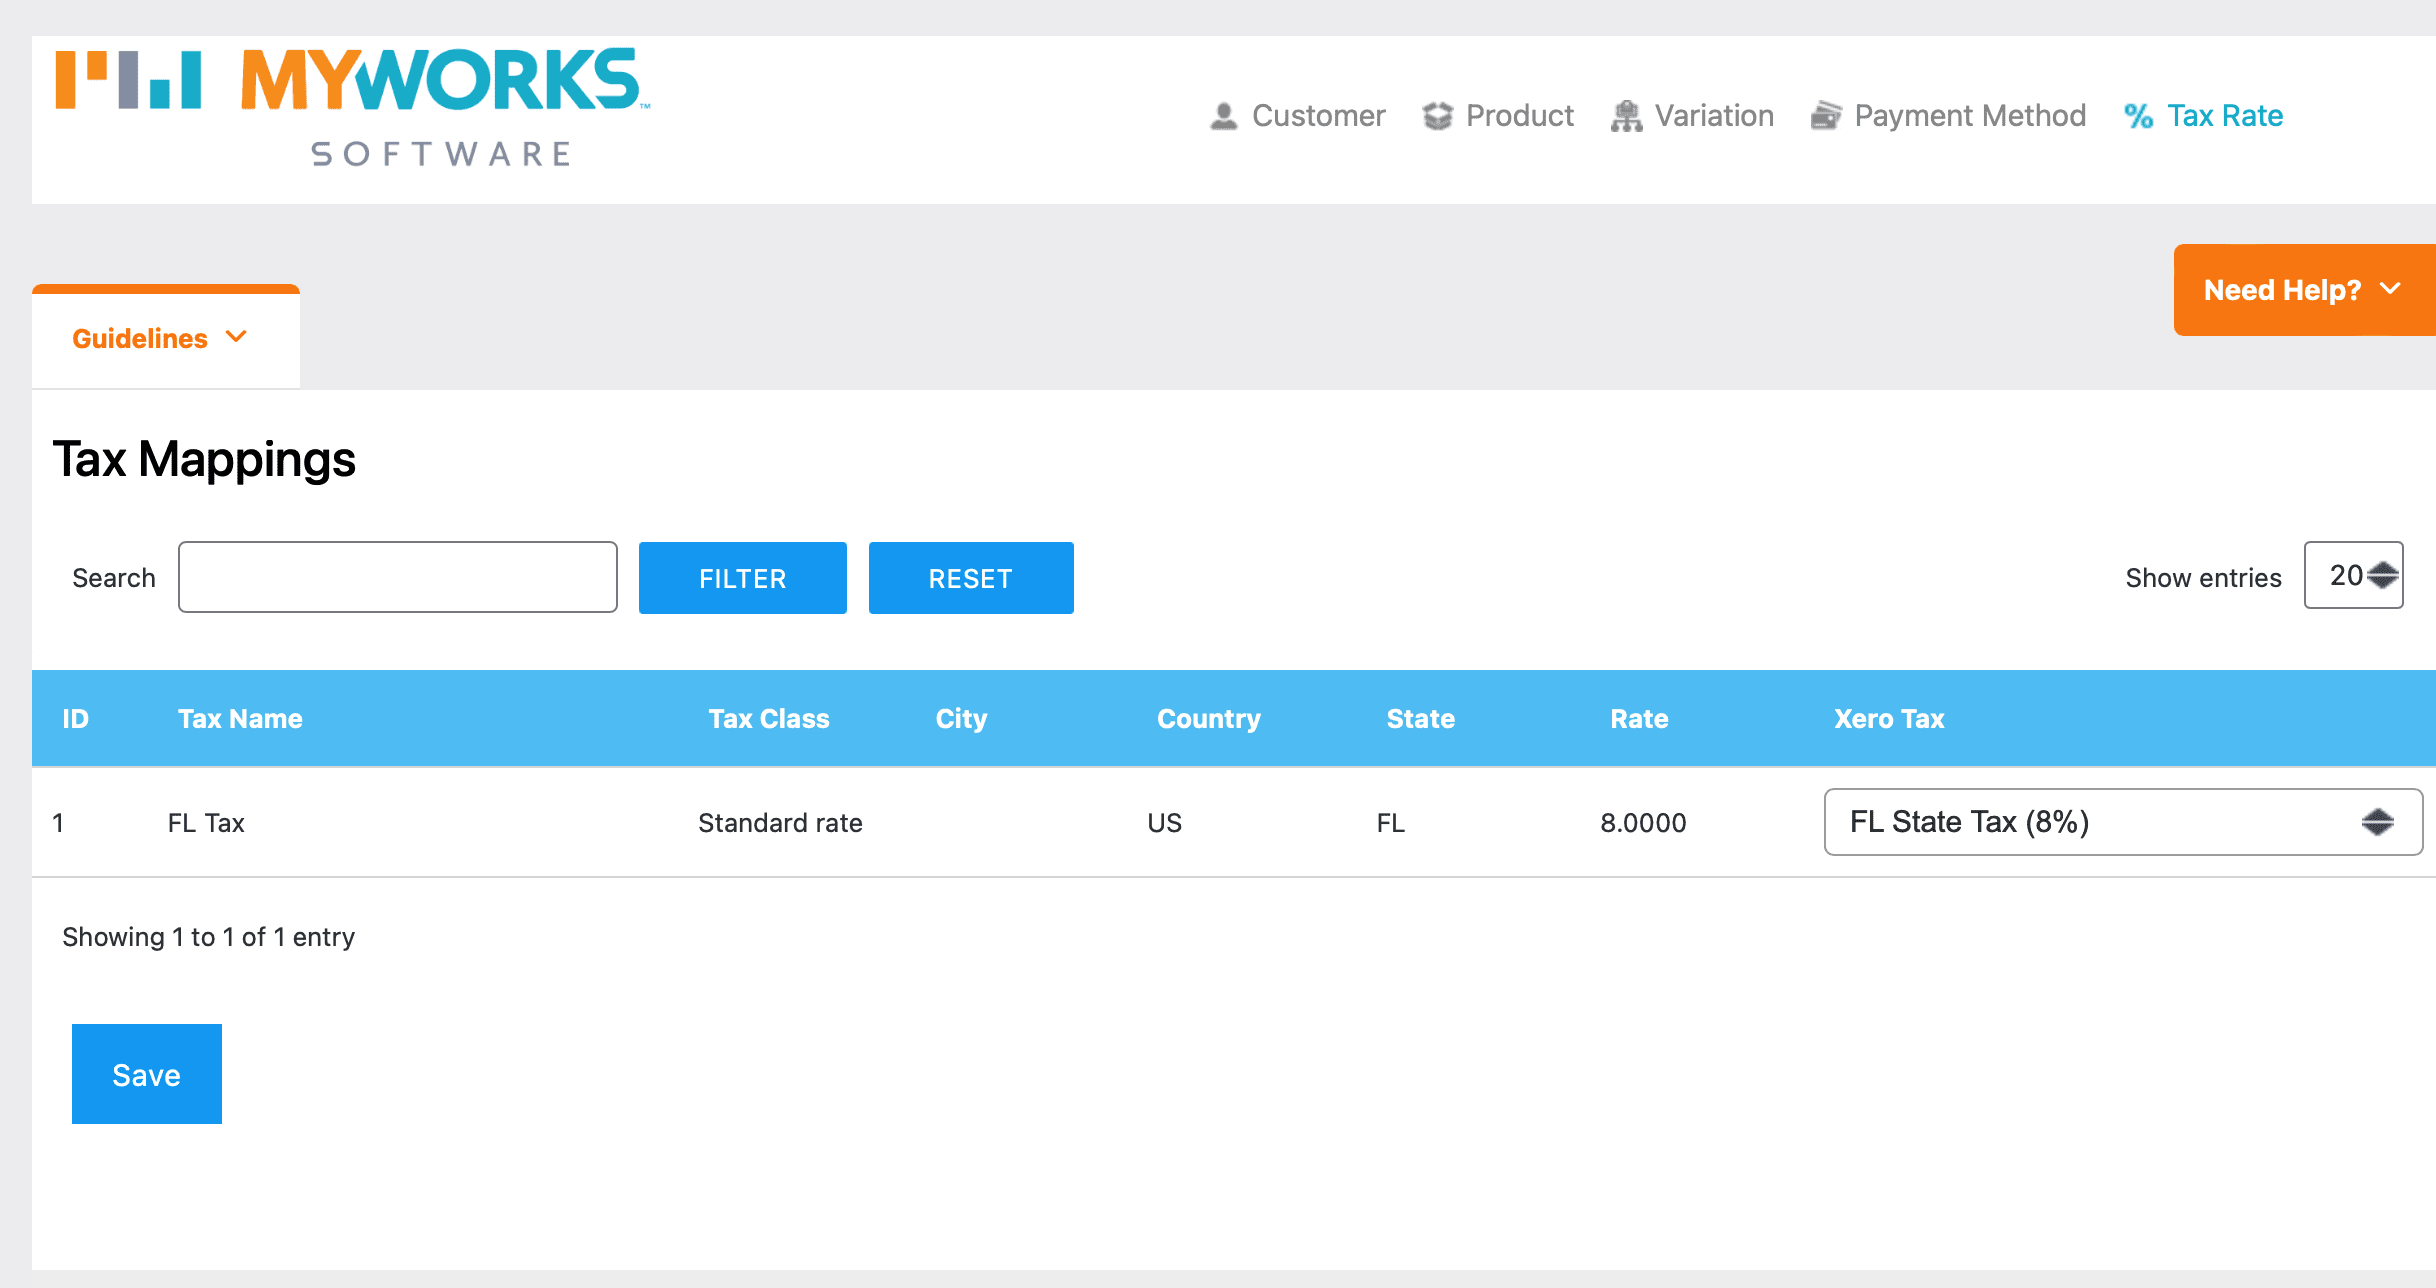
If you're charging tax in WooCommerce, you'll be able to map each WooCommerce tax rate to a corresponding Xero rate on this page. This ensures taxed orders are correctly syncing to Xero using the corresponding Xero tax rate.
If you're using an automated sales tax tool in WooCommerce - like Avalara or TaxJar, you can instead sync tax as a line item. This can be enabled in MyWorks Sync > Settings > Tax.
