With our WooCommerce Warehouses integration for WooCommerce, you can add and manage multiple warehouses / locations right in your WooCommerce admin.
Initial Setup
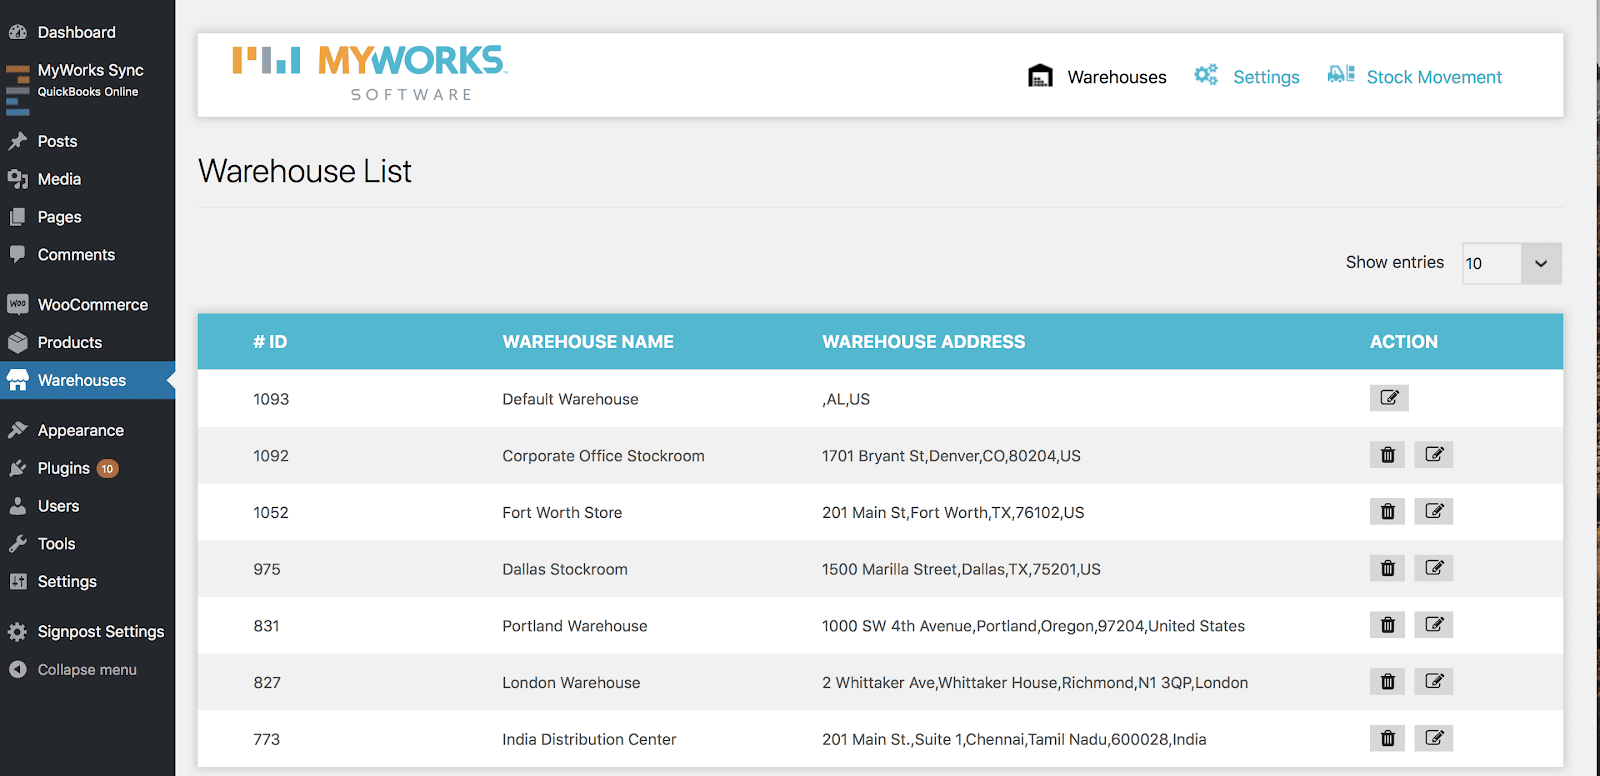
After our plugin is installed and activated, a new Locations tab will be added to your menu bar. Clicking that will bring you to the settings/configuration panel for your Locations.
A Default Warehouse will always exist to act as your "1st location". All current product inventory will be moved into this location. This default location can be edited/renamed, but not deleted.

Adding/Managing Locations
After visiting Locations in your Wordpress Admin, you'll see your list of locations. This is where you can manage your existing locations, or add more locations up to your license limit.

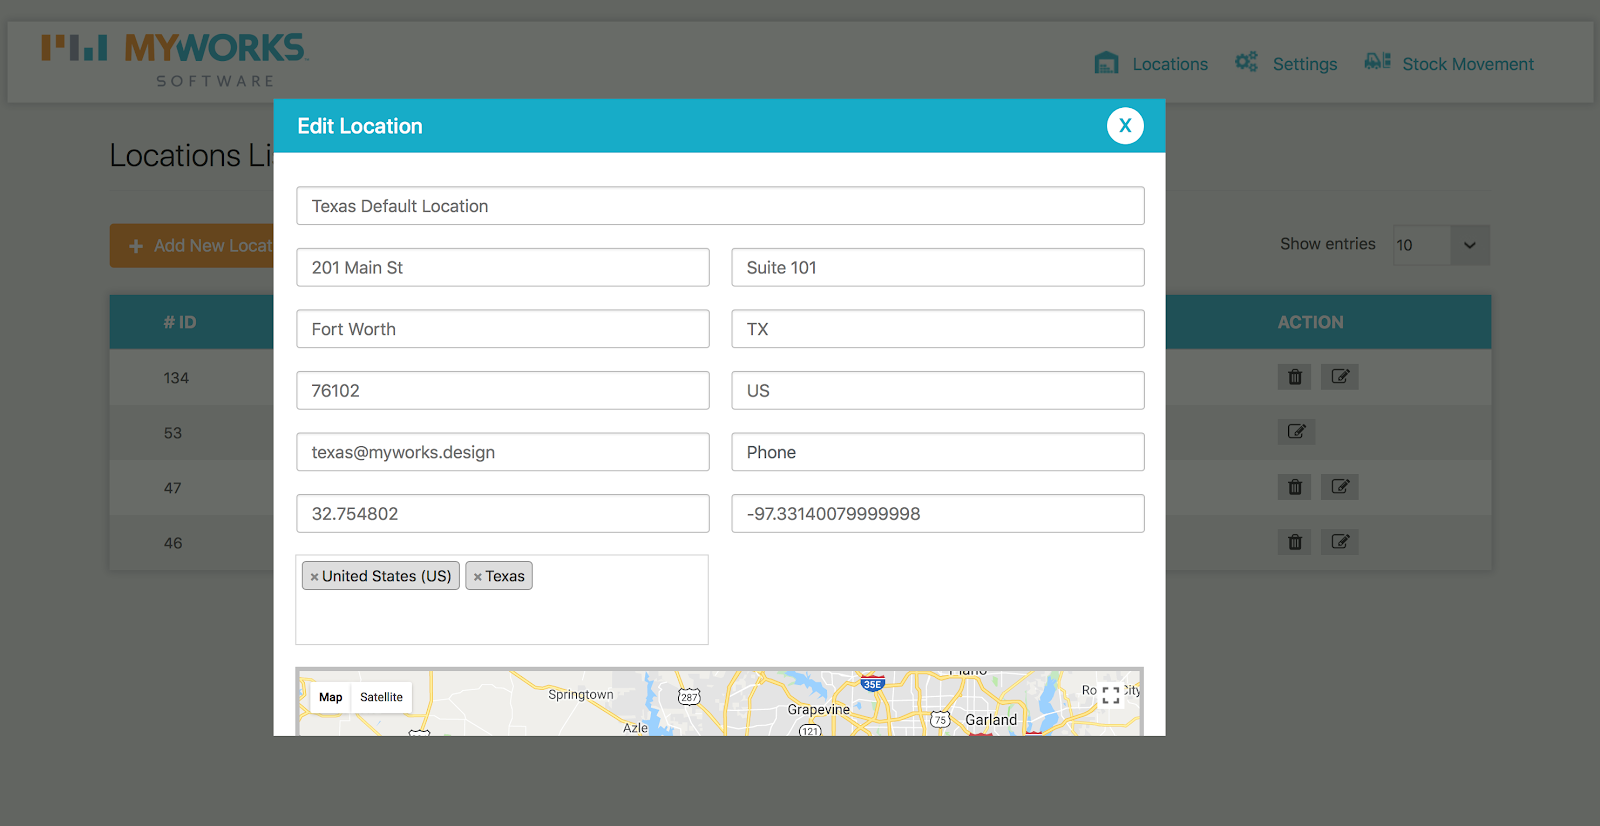
Name: The front-facing nickname for this location.
Address 1/2, City, State, Zip, Country: The full address for this location (used for proximity/geo location).
Email Address: The email address for this location (used for location-specific order emails). You may add multiple email addresses here, separated with a comma.
Phone: The phone number for this location
Region (optional): The assigned regions for this location. If left blank, this location will serve inventory to all visitors, otherwise only to visitors within the assigned regions.